How Change Shopify Theme Without Losing Content
Revamp your online store effortlessly with our guide on how to change Shopify theme. Enhance the look and feel of your website to captivate customers.
Explore our Shopify themes for conversion today and transform your store into a revenue-generating powerhouse.
How to Change Shopify Theme without losing content: Pre-Update Checklist
Before you begin swapping or updating any Shopify themes, there are a few key steps you should take to ensure none of your content or customizations are lost:
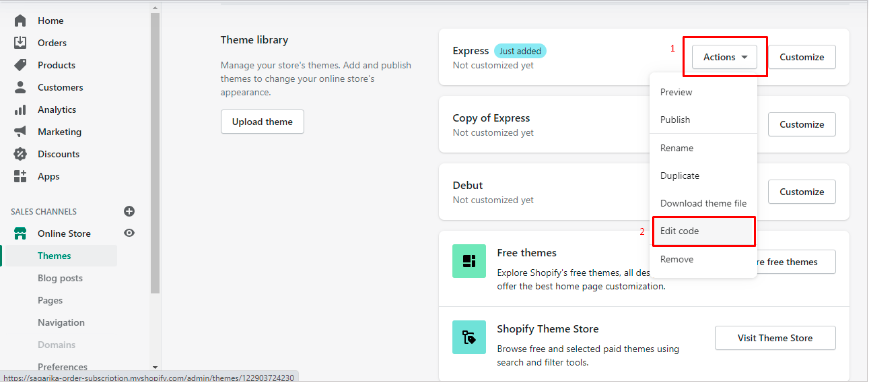
- Backup Your Current Theme: Navigate to your ‘Themes’ page, click on ‘Actions’ for your current theme, and select ‘Download theme file’.
- Review Custom Code: Document any custom code or modifications you’ve made to your current theme to reapply later.
- Save Snippets: Take screenshots or notes of current theme settings and copy any custom liquid code snippets to an external file.
- Inventory Your Content: Make sure you know where your texts, images, and other media are stored so you can easily re-add them if needed.
6 Steps to Safely Change Shopify Theme

Step 1: Choose And Install Your New Shopify Theme
Shopify offers free and paid themes in the Shopify Theme Store. You can also purchase themes from third-party vendors. Once you’ve found a new theme, click ‘Add theme’ or ‘Buy theme’ to install it on your store.
Step 2: Preview And Customize Your New Theme
Before you publish, take the time to preview your new theme and make any customizations to match your brand. This can include:
- Adjusting color schemes
- Setting up typography
- Reconfiguring navigation and menus
- Placing and formatting images

Step 3: Transfer Custom Code And Reapply Customizations
Reapply any custom code snippets or features you had in your old theme. Be cautious since not all code will be compatible with your new theme.
Insert a table to show a comparison of common custom changes. Continue with more rows as needed
| Custom Feature | Old Theme Code Snippet | New Theme Code Snippet |
|---|---|---|
| Header Customization | Old code snippet for header | A new code snippet that corresponds to the same customization but for the new theme |
| Footer Adjustments | Old code snippet for footer | Applicable footer code for the new theme |
Step 4: Test Your Theme Thoroughly
Test your new theme thoroughly by reviewing all pages, links, and functionalities to ensure they work as expected. Consider using a checklist or this testing guide:
- Check all page templates (home, product, collection, etc.)
- Ensure links redirect correctly
- Verify that images load and are sized appropriately
- Test the mobile responsiveness of the theme
- Review the shopping cart and checkout processes
Step 5: Publish Your New Theme
Once you’re satisfied that everything is perfectly set up, go to the ‘Themes’ page, look for your new theme, and click on ‘Actions > Publish’ to make it live for your customers.
Step 6: Monitor And Adjust Post-launch
Monitor your site’s performance and customer feedback closely after going live. You may need to make adjustments as you receive real user interaction data.
The best Shopify theme for large inventory is the “Empire” theme, known for its scalability.
In Conclusion: A Fresh Look Without the Hassle
Changing your Shopify theme doesn’t have to result in content loss. By following the proper procedures, you can achieve a fresh and updated look for your Shopify store without risking your content and customizations. Take it step-by-step, back everything up, and transition with confidence.


