
How to Make Squarespace Live Chat
Are you looking to improve customer service on your Squarespace website? Adding a live chat feature is a great way to provide instant support to your visitors and increase customer satisfaction.
Squarespace Live Chat offers real-time support, empowering users to swiftly resolve queries and optimize their website experience.
Seamlessly integrated within the platform, it ensures instant assistance for smoother website management and enhanced customer satisfaction.
Before reading this blog post see our previous blog post about Which is Better: Shopify Vs Squarespace 2024? Choosing between Shopify Vs Squarespace hinges on your needs; Shopify excels in e-commerce, while Squarespace shines in design and simplicity.In this article, we will discuss how to make Squarespace live chat a reality for your website. There are two main ways to integrate live chat with your Squarespace website, each with its pros and cons.
1. Official LiveChat Integration
Squarespace offers a dedicated integration with LiveChat, which is currently the only native live chat option. This method provides seamless installation, secure authorization, and access to additional features like message routing, canned responses, and reporting.Pros:
- Seamless integration: No code injection is required.
- Secure authorization: Uses OAuth for a secure connection.
- Additional features: Access to LiveChat’s full suite of features.
Cons:
- Limited options: Only one provider choice (LiveChat).
- Potential cost: Requires a paid LiveChat subscription.
How to integrate live chat?
- Log in to your Squarespace account and select the website.
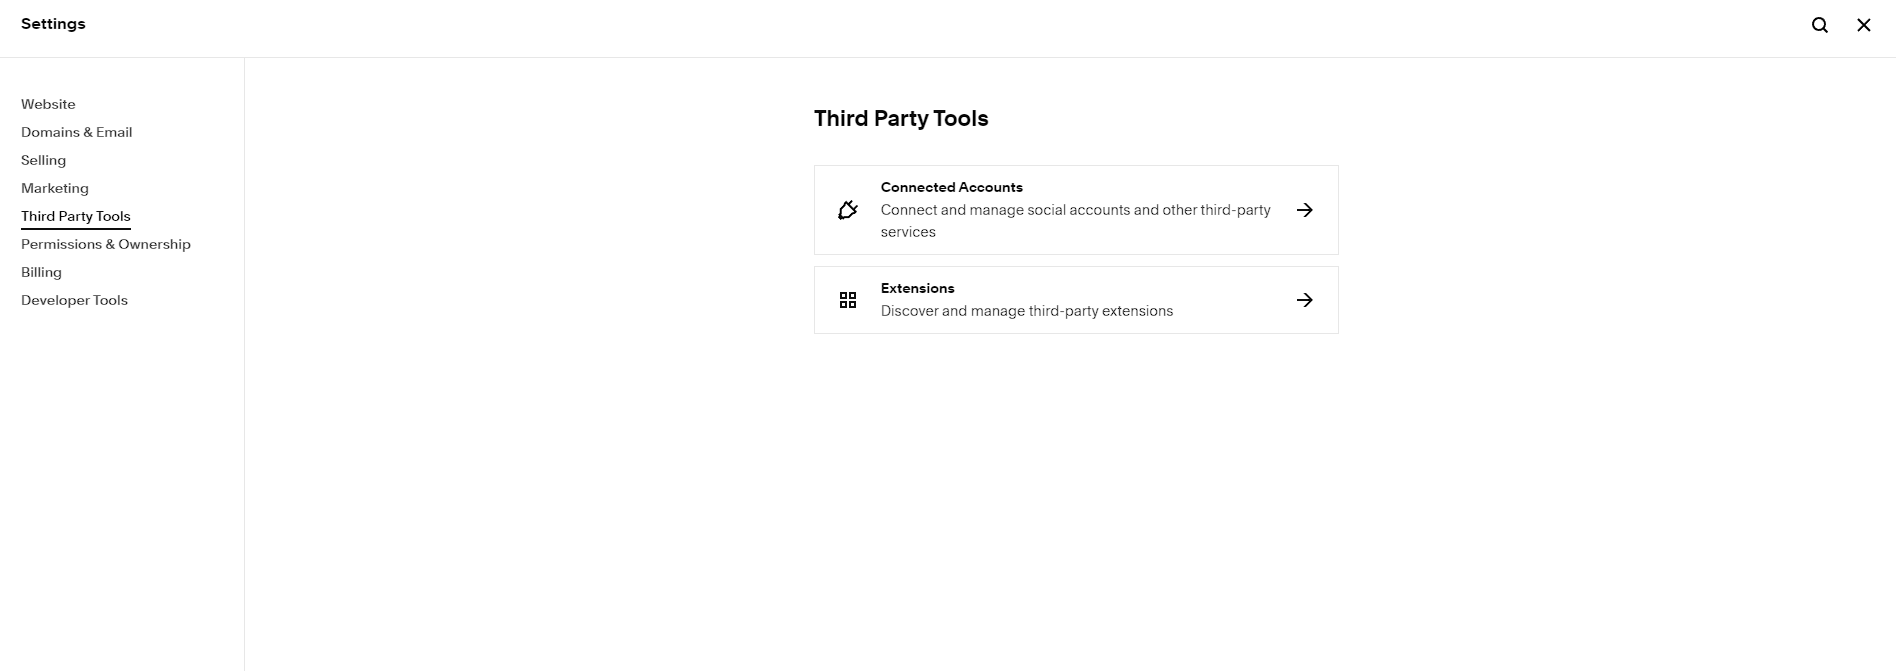
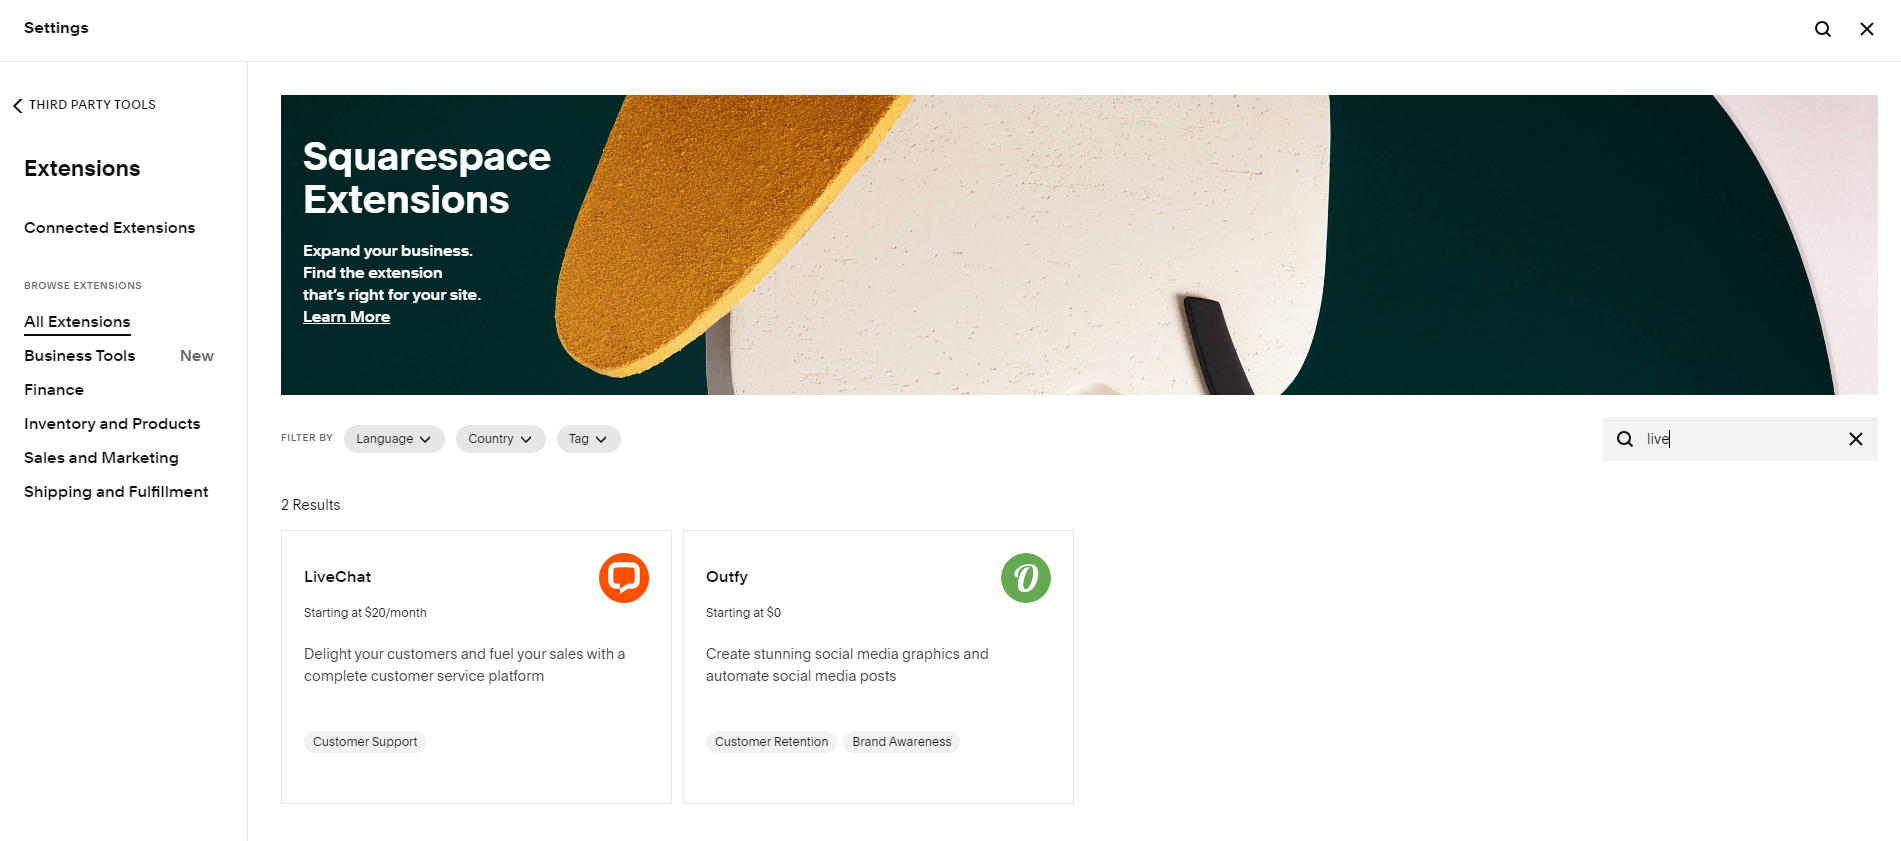
- Go to Settings > Extensions.
- Search for “LiveChat” and click “Connect.”
- Log in to your LiveChat account or create one.
- Select the website and toggle “Chat Enabled” on.
2. Third-Party Live Chat Plugins:
Several third-party live chat services offer plugins compatible with Squarespace. These plugins require code injection but provide a wider range of options and often have free plans.Step 1: Sign Up with a Live Chat Provider
The first step in adding live chat to your Squarespace website is to sign up with a live chat provider. There are many options available, such as LiveChat, Zendesk Chat, and Olark. Choose the provider that best fits your needs and budget.Step 2: Install the Live Chat Code
Once you have signed up with a live chat provider, you will be given a snippet of code to install on your website. In Squarespace, you can easily add this code to your website by following these steps:- Log in to your Squarespace account.
- Go to the settings for the page where you want to add live chat.
- Select “Advanced” and then “Code Injection.”
- Paste the live chat code into the header or footer section, as instructed by your live chat provider.
- Save the changes.
Step 3: Customize the Live Chat Widget
Once the live chat code is installed on your Squarespace website, you can customize the live chat widget to match your website’s branding and design. Most live chat providers offer customization options, allowing you to choose the colors, widget position, and behavior that best suit your website.Step 4: Test the Live Chat Feature
Before making live chat available to your website visitors, it’s important to test the feature to ensure that it’s working correctly. Most live chat providers offer a test mode or a way to chat with their support team to verify that the live chat is functioning as expected.Step 5: Train Your Team
If you have a team of representatives who will be handling live chat inquiries, it’s essential to provide them with the necessary training. Ensure that your team understands how to use the live chat system, the types of inquiries they may receive, and the best practices for providing excellent customer support via live chat.Step 6: Monitor and Improve
Once live chat is up and running on your Squarespace website, it’s important to monitor its performance and make improvements as needed. Pay attention to response times, customer satisfaction ratings, and the types of inquiries you receive. Use this data to refine your live chat strategy and continue to provide top-notch support to your website visitors. By following these steps, you can successfully add live chat to your Squarespace website and enhance the overall customer experience. With instant support just a click away, your visitors will appreciate the convenience and personalized assistance that live chat provides.Here are some popular third-party options to consider
- Tawk to: You shouldn’t have to pay to chat with the visitors on your website. They’re your visitors!
- Elfsight Live Chat: Offers multiple widgets, including live chat and chatbots, with free and paid plans.
- Tidio Chat: Free basic plan with paid options for advanced features.
- Chatra: Free plan with visitor limitations, paid plans for more users and features.
- Zendesk Chat: Comprehensive live chat solution with paid plans only.
Additional Tips to make Squarespace Live Chat
- Consider your budget: If you’re on a tight budget, a free third-party plugin might be the way to go. However, consider the limitations and potential support concerns.
- Think about features: Identify the specific features you need, such as multi-channel messaging, offline forms, or file sharing. Choose a solution that offers these features.
- Read reviews and compare options: Take time to research different plugins and their features before making a decision.
- Start with a free trial: If available, try out a free trial of a paid service to see if it meets your needs before committing.