How do I cancel an app subscription?
To cancel an app subscription, go to your account settings and select the subscription. Then, could you choose the option to cancel it?
Are you tired of paying for app subscriptions you no longer need or want? Cancelling them is easier than you might think. With just a few clicks, you can stop automatic billing and avoid being charged in the future.
Whether you’re trying to save money or simply declutter your digital life, cancelling app subscriptions is a task worth tackling.
Locate And Manage Your Subscriptions
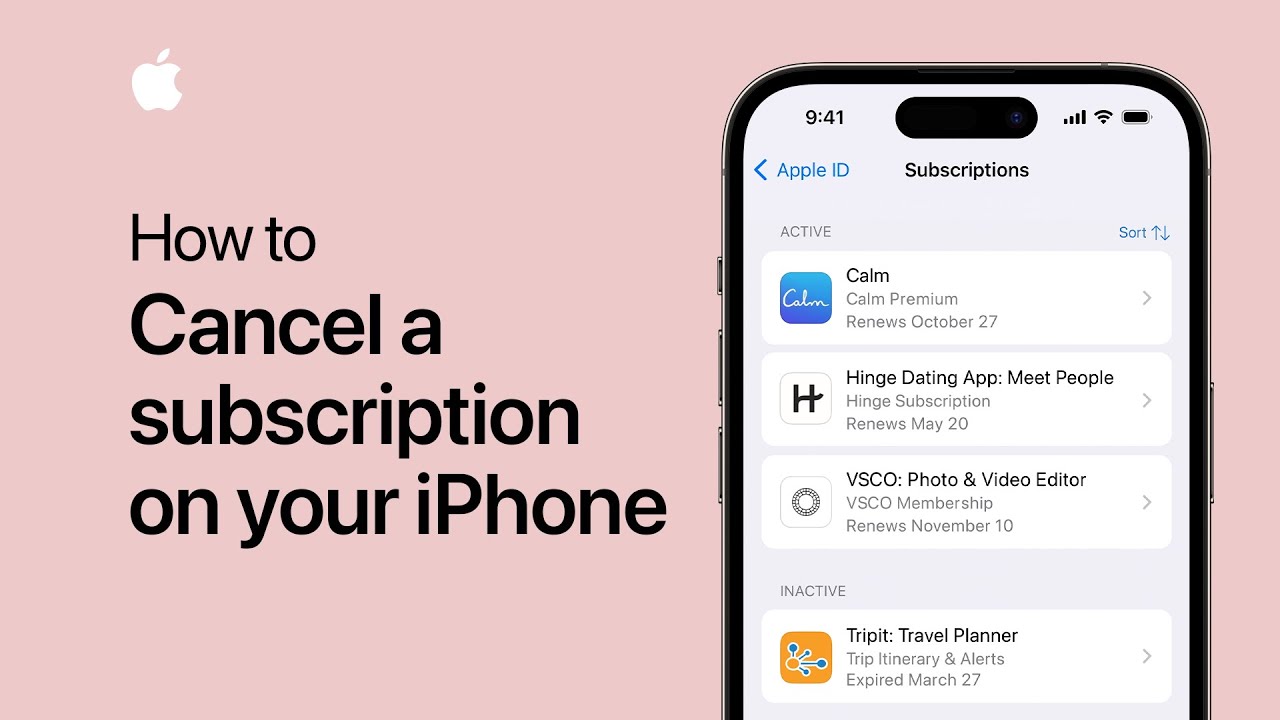
Credit: www.youtube.com
Cancel Through The App Store
To cancel an app subscription, go to the App Store, tap on your profile, select ‘Subscriptions’, choose the app you wish to cancel and hit ‘Cancel Subscription’. This ensures future billing is stopped.
To cancel an app subscription, simply follow these steps within the App Store:
- 1. Open the App Store and select “Subscriptions”.
- 2. Choose the subscription you want to cancel from your list of active subscriptions.
- 3. Tap “Cancel Subscription”.
- 4. Confirm your cancellation request by tapping “Confirm”.
- 5. You will receive an unsubscribe notification and the subscription will end at the end of the current billing cycle.
It’s important to note that you should cancel subscriptions at least 24 hours before the end of the current billing cycle to avoid being charged for the next cycle. Cancelling a subscription through the App Store is quick and easy, so don’t hesitate to cancel any subscriptions you no longer need.
Getting A Refund For A Subscription
If you’re not satisfied with a subscription-based app and want to cancel it, you can also get a refund, depending on the app store and device you’re using. To get a refund from an iPhone or iPad, go to your App Store purchase history and select the app you want a refund for.
There, you can request a refund. On the other hand, if you’re using a Mac or PC, you must contact the app developer directly. Check their website for contact information and request a refund from them.
If that fails, you can file a complaint with the app store. In conclusion, getting a refund for a subscription is possible depending on the device you’re using.
If you’re using an iPhone or iPad, you can request a refund through the App Store’s purchase history. However, if you’re using a Mac or PC, you must contact the app developer for a refund.
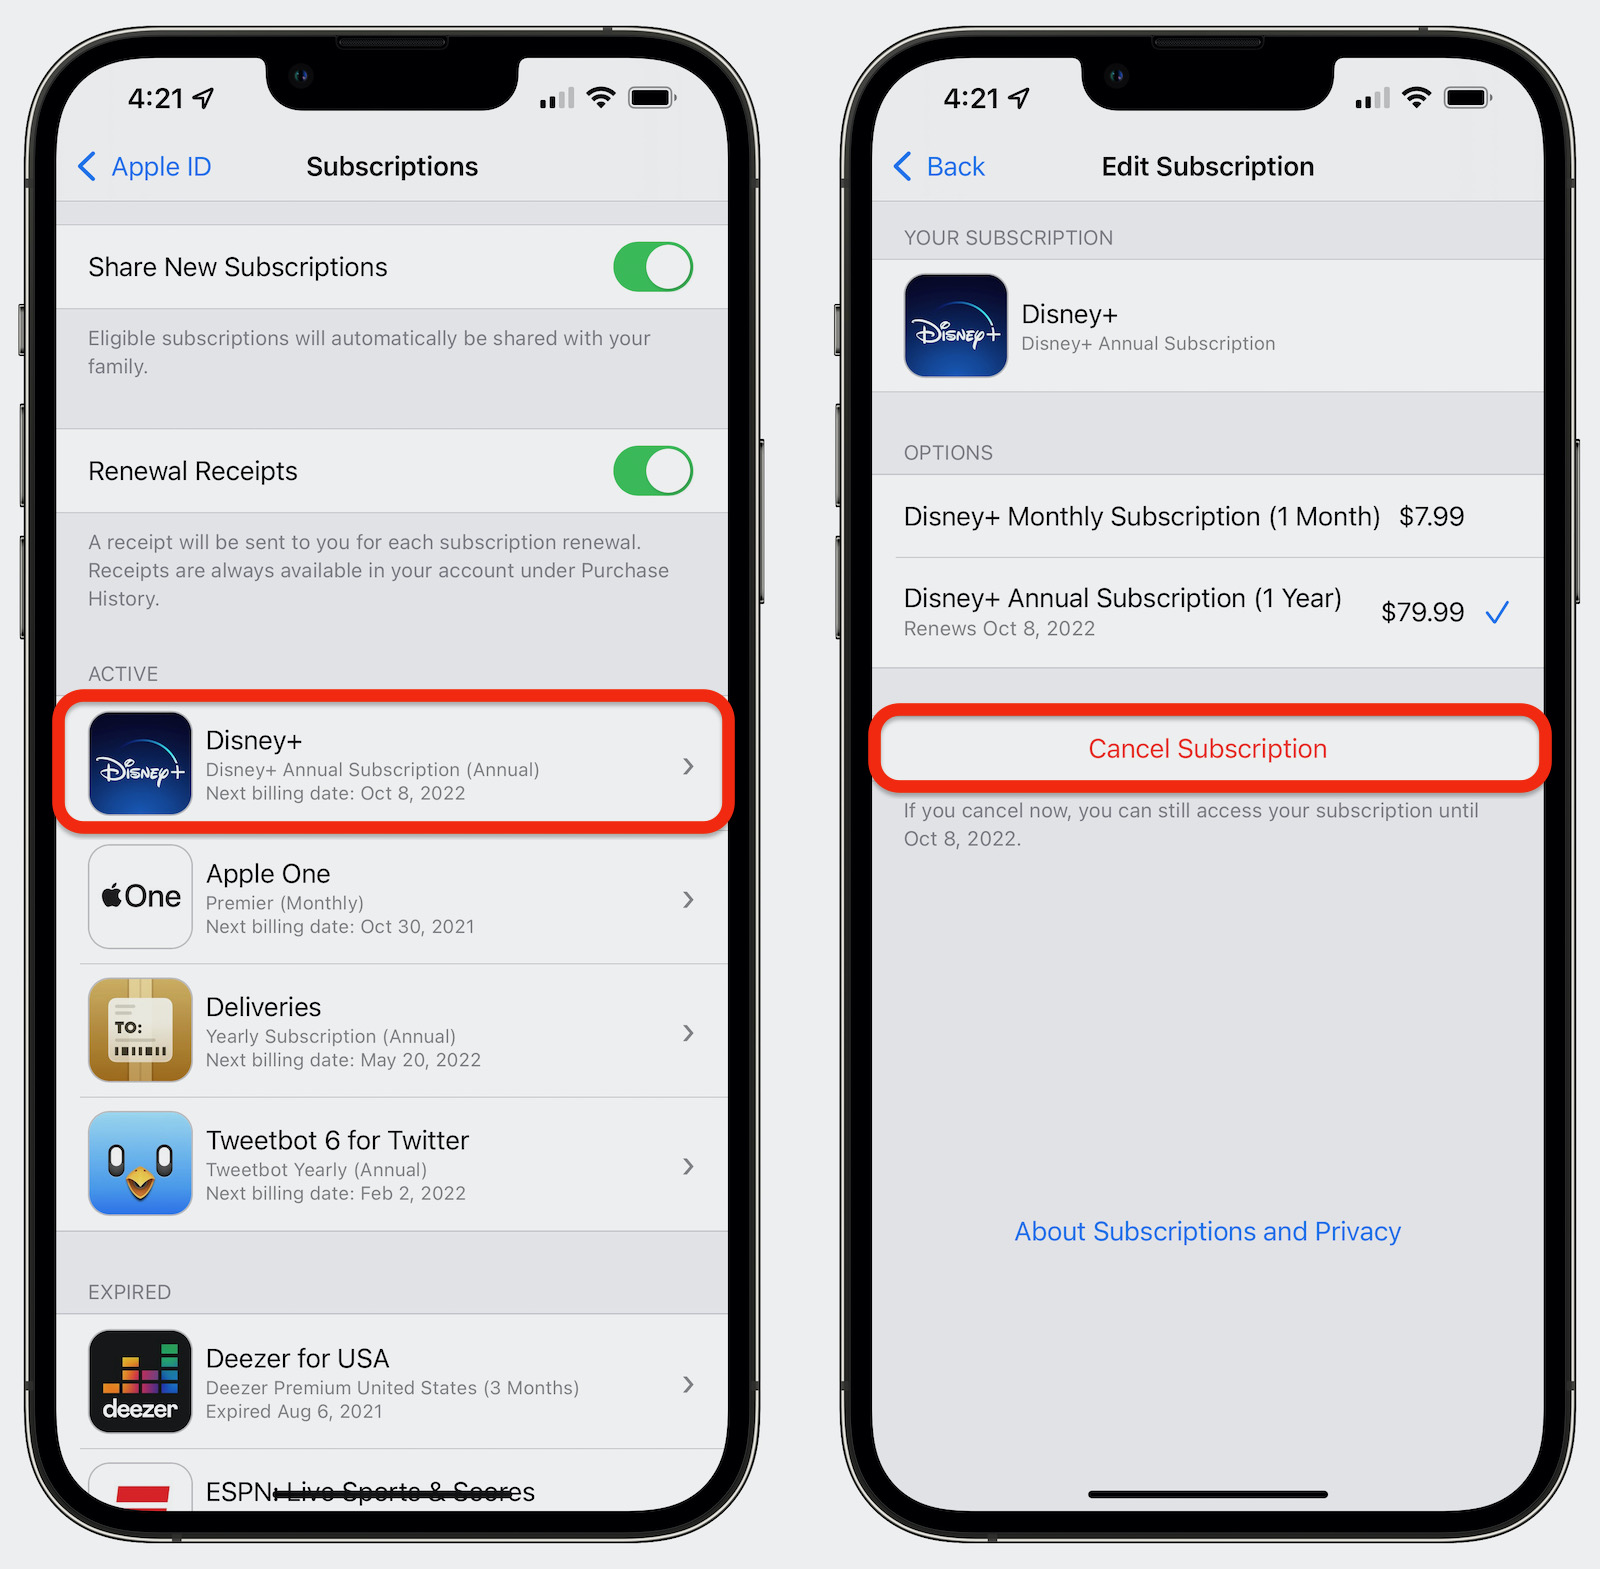
Credit: www.macrumors.com
Avoid Subscription Auto-Renewal
If you wish to cancel an app subscription, it is important to make sure that the auto-renewal feature is turned off.
To disable automatic renewal on your iPhone or iPad, go to the Settings app, select your Apple ID, tap on subscriptions, and then select the subscription that you want to cancel. Once selected, tap on the option to cancel the subscription.
To disable automatic renewal on a Mac or PC, open iTunes, select the account option, and then click on the View Account tab.
Next, click on the Manage link next to Subscriptions, select the subscription you want to cancel, and then click on the option to cancel the subscription.
By following these steps, you can easily cancel any unwanted app subscription and avoid future automatic renewals.

Credit: appsupport.supersimple.com
Frequently Asked Questions: How Do I Cancel An App Subscription
How Do I Cancel an App Subscription on My iPhone?
To cancel an app subscription on your iPhone, go to your phone settings, then select your Apple ID, select Subscriptions, find the app you want to cancel, and hit Cancel Subscription.
How Do I Cancel A Subscription?
To cancel a subscription, log in to your account on the company’s website or app. Look for an option to manage your subscriptions and find the one you want to cancel. Click the cancel button and follow the prompts to confirm the cancellation.
How Do I Cancel An Online App Purchase?
To cancel an online app purchase, go to the app store where you made the purchase. Find the app in your purchase history, click on it, and select the “Cancel Purchase” option. Follow the prompts to complete the cancellation process.
Will Deleting the App Stop Payments?
No, deleting an app will not automatically stop payments. You need to cancel or unsubscribe from the service to stop payments. Deleting the app only removes it from your device, but not the payment agreement.
Conclusion
Cancelling an app subscription may seem daunting, but it is a straightforward process. Remember to check the subscription details to ensure you cancel it within the right time frame.
Whether you prefer to cancel through the App Store or directly with the app developer, always verify the cancellation to avoid future charges. With these steps in mind, cancelling your app subscription will be a breeze. Happy cancelling!