Redesign WordPress Website
Redesign WordPress Website involves updating the theme, layout, and design elements to improve the overall appearance and functionality.
It can be done by following a step-by-step process that includes backing up the site, choosing a new theme, and making necessary adjustments.
Hiring a professional web design company in Austin, Texas, for this task can help ensure a successful website redesign. Redesigning an existing website can potentially enhance website performance and user experience by refining the color scheme, fonts, logo, design elements, button colors, and placement.
It is important to clearly understand the site goals and engage in the technical aspects of the process. The cost of a WordPress website redesign varies depending on the complexity of the project and the chosen web design agency.
To integrate an Etsy page On WordPress site, utilize the Etsy Shop plugin or embed code snippets.Step-by-step guide to Redesign WordPress Website:
Step 1: Login And Back-up Your WordPress Website
- Login to Your WordPress Website: First, you need to log in to your WordPress website using your credentials. Once logged in, you can access the dashboard to make changes to your website.
- Create a Backup Plan: Before making any changes to your website, it’s important to create a backup plan to ensure you can restore your website in case something goes wrong. There are several plugins available that can help you create backups of your WordPress website.
By following these steps, you can safely proceed with the redesign process for your WordPress website.
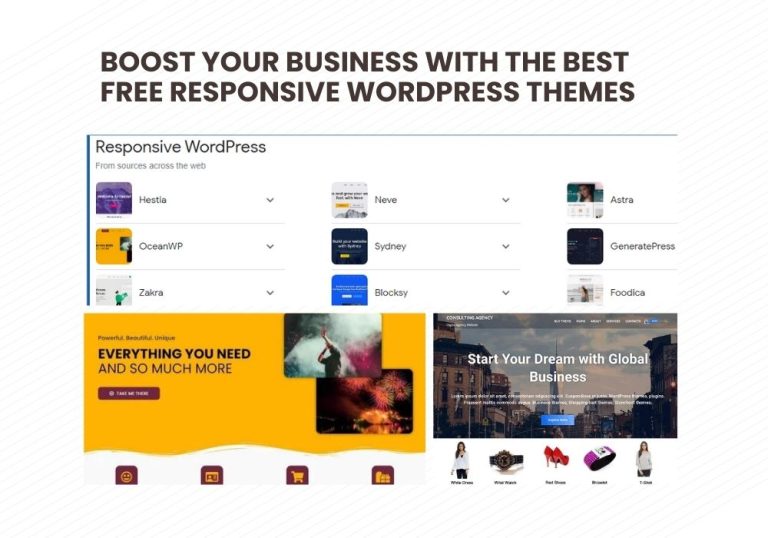
Step 2: Choose A Theme
Selecting a New Theme for Redesign
Choosing the right theme is an important step in redesigning your WordPress website. It sets the overall look and feel of your site and determines how your content will be presented. When selecting a new theme, consider the following:
- Design: Look for a theme that aligns with your brand and represents your content well.
- Functionality: Make sure the theme offers the features and functionality you need for your website.
- Responsiveness: Choose a theme that is mobile-friendly and adapts well to different screen sizes.
- Customization: Look for a theme that allows you to customize colors, fonts, and layouts to match your preferences.
- Third-party integration: Consider if the theme supports integration with plugins or services you rely on.
Once you have selected a theme, you can install and activate it within WordPress. Go to the “Appearance” section in your WordPress dashboard, click on “Themes”, and then click on “Add New”.
You can either search for a theme by name or browse through the available options. Once you find the desired theme, click on “Install” and then “Activate” to make it live on your website.
Step 3: Customizing The Homepage
Designing the Hero Section
- Create a visually appealing hero section for your WordPress website.
- Use high-quality images or videos that align with your brand and message.
- Consider using a compelling headline and call-to-action button.
- Ensure that the hero section is responsive and works well on different devices.
Creating a Menu using Custom Links
- Add a menu to your WordPress website using custom links.
- Include important pages, such as Home, About Us, Services, and Contact.
- Organize the menu items logically for easy navigation.
- Customize the menu design to match your website’s overall aesthetic.
Designing Header, Logo, Favicon, Nav Menu & CTA Button
- Design an attractive header for your WordPress website.
- Create a professional-looking logo that represents your brand.
- Add a favicon to enhance your website’s visual identity.
- Create a user-friendly navigation menu and position it appropriately.
- Include a compelling call-to-action button to encourage user engagement.
Step 4: Layout And Design Elements
Creating multi-column layouts is an essential part of redesigning a WordPress website. By utilizing CSS and HTML, you can easily divide your content into multiple columns, making it more visually appealing and organized.
Additionally, applying styling effects like borders and box shadows can help to enhance the overall design of your website. These effects can be used to highlight certain elements and create a more dynamic and engaging user experience.
Making typography responsive with REM units is also crucial in ensuring that your website looks visually consistent and appealing across different devices.
REM units allow you to set font sizes relative to the root element, making it easier to create a responsive design that adapts to different screen sizes. Lastly, when redesigning your website, it’s important to consider mobile-friendly elements.
With the increasing number of users accessing websites on their mobile devices, it’s crucial to ensure that your website is mobile-friendly, with elements that are easily accessible and optimized for smaller screens. By following these guidelines, you can create a layout and design that not only looks great but also enhances the user experience.
Step 5: Customizing Additional Pages
New Design for the Services Page:
When redesigning the services page on your WordPress website, it is important to focus on providing clear and concise information about the services you offer.
Use visually appealing elements such as images and icons to make the page more engaging. Consider organizing the services into categories or sections for easy navigation. Highlight the key features and benefits of each service to attract potential customers.
Incorporate call-to-action buttons or links that encourage visitors to take the next step and contact you for more information or to make a purchase.
Make sure the content is SEO optimized by including relevant keywords and meta tags. Additionally, ensure that the page is mobile-friendly and loads quickly for a better user experience.
About Us Page: The About Us page is an opportunity to showcase your company’s values, mission, and history. Use engaging and persuasive language to tell your story and connect with your audience. Include relevant images, videos, and testimonials to build trust and credibility.
Provide information about your team members, their qualifications, and expertise. Make sure the page is visually appealing and easy to navigate.
Consider adding links to your social media profiles and other relevant pages on your website. Lastly, optimize the page with relevant keywords and meta tags for better search engine visibility.
Contact Page with Form and Map: Adding a contact form and map to the contact page makes it easy for visitors to get in touch with you. Include a simple and user-friendly contact form that collects essential information such as name, email, and message.
Make sure the form is properly integrated and tested for functionality. Embed a map with your business location to provide clear directions to potential customers. Enhance the page with additional contact information, such as phone number and email address.
Consider adding a call-to-action button that directs visitors to contact you directly. Ensure that the page is mobile-friendly and loads quickly for a seamless user experience.
Credit: www.forbes.com
Step 6: Footer And Widgets
Designing the Footer of your WordPress website is an important step in the redesign process. The footer provides valuable information and enhances the user experience.
When designing the footer, you can customize it to match the overall theme and branding of your website. You can include elements such as copyright information, contact details, social media links, and navigation menus in the footer.
This helps users navigate through your website easily and find the information they need. Additionally, you can add custom widget blocks to the footer to display additional content or functionality.
These custom widget blocks can be created using plugins or by editing the theme’s code. By carefully designing the footer and adding custom widget blocks, you can create a visually appealing and functional footer for your WordPress website.
Step 7: Advanced Features And Optimization
Implementing Scroll Effects with Advanced HTML Anchor. To create a scrolling effect on your website, you can utilize advanced HTML anchor tags. These tags allow you to link to specific sections within a webpage and provide a smooth scrolling experience for your users.
By adding a class or ID to the desired section and using the anchor tag with the corresponding identifier, you can implement a scroll effect. This can help create a visually appealing and interactive user experience.
Adding Animations for Headings and Paragraphs. Animations can bring life to your headings and paragraphs and make them more engaging for users.
With CSS animations, you can add effects such as fade-ins, slide-ins, or even more complex animations to your website’s content.
By applying CSS classes with specific animation properties to your headings and paragraphs, you can create eye-catching and visually appealing elements on your WordPress website. Optimizing Website Performance with Google Core Web Vitals.
Website performance is crucial for user experience and search engine optimization. Google Core Web Vitals is a set of metrics that measure various aspects of website performance, including loading speed, interactivity, and visual stability.
By optimizing your website based on these metrics, you can improve user satisfaction, increase conversion rates, and potentially rank higher in search engine results.
Some optimization techniques include optimizing images, minifying CSS and JavaScript files, leveraging browser caching, and reducing server response time.
Remember, implementing advanced features and optimizing your WordPress website can enhance its overall aesthetics, improve user engagement, and positively impact its performance.
Step 8: Migration To A New Host
|
When it comes to migrating your WordPress website from one host to another during a website redesign, it’s important to follow a proper procedure to ensure a smooth transition. Here are some steps to help you migrate your WordPress website:
|
By following these steps, you can successfully migrate your WordPress website to a new host while redesigning your website. This ensures that your website remains accessible and functional throughout the migration process.
Conclusions
To revamp your WordPress website effectively, follow these steps: 1) Log in to your WordPress Website, 2) Redesign the Homepage, 3) Implement a Backup Plan, 4) Add a Theme, 5) Optimize Services, 6) Focus on Spacing, 7) Enhance the About Us Section, 8) Customize the footer.
This process will breathe new life into your site, improving its visual appeal and functionality. Take advantage of resources like Elementor and Gutenberg for a smooth transition. Don’t hesitate to perform a website redesign if it aligns with your goals and enhances the user experience.